Before you start
With the installation of this solution you acknowledge that you have read these instructions carefully and performed a system backup before starting. Support for this solution will be provided to the best of my ability, as there are other applications involved there may be limited capabilities to resolve all issues.
Installation Requirements
| Note |
|---|
Ninite Solution is separate from your Ninite Pro subscription. |
Before starting the installation of Ninite Solution please ensure that you have completed the following tasks.
Perform a full system backup
Create the following folder structure on your LTShare, which you can find either directly on your ConnectWise Automate serer, or via the mapped share on your workstation. usually found at L:\
LTSHARE\Transfer\Scripts\MP\Ninite
Download Ninite Pro Classic from the Ninite Website; which requires a Pro Subscription and rename it to NiniteOne.exe and then place the executable into the folder created in step 2.
| Info |
|---|
Note
|
Installation Instructions
| Warning |
|---|
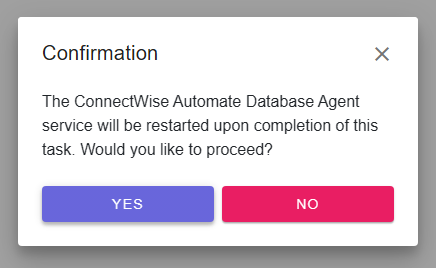
Installing Ninite Solution will cause the Database Agent service to restart terminating any running scripts. For additional information, refer to View Running Scripts. |
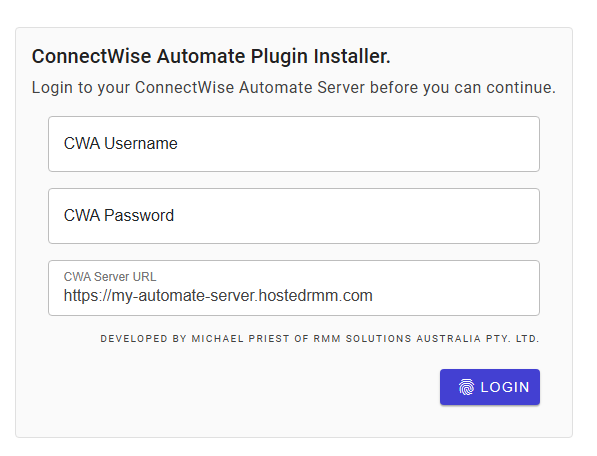
Launch the Plugin Installer: https://installer.rmmsolutions.com.au
Login and Authenticate with your ConnectWise Automate Server with an account that has Super Admin privileges.
Select Ninite Solution from the plugin list.

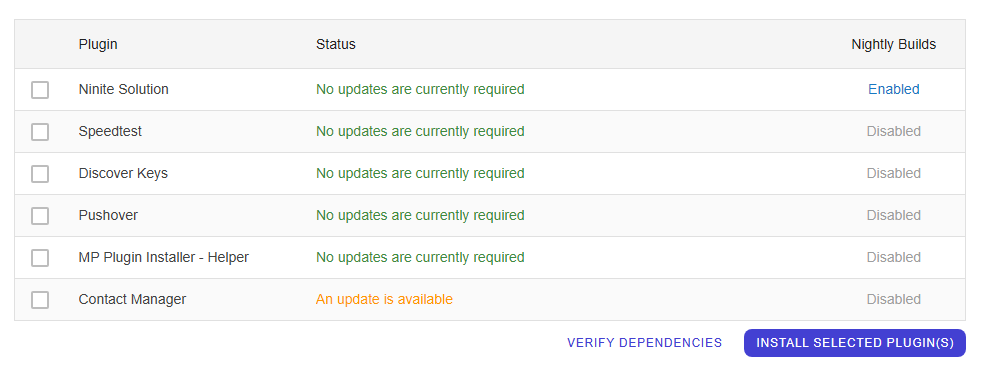
Click on the Install Selected Plugin(s) button, you will see a prompt about the Database Agent being restarted during this process to proceed you need to click Yes.
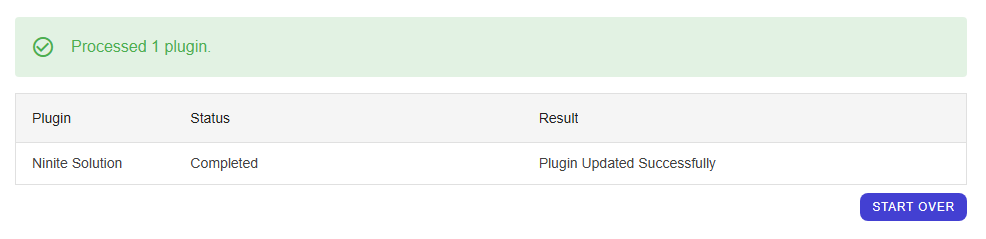
Once the Installation has been completed you will see a confirmation that the LabTech Database Agent service has been issued a restart command

Proceed to Configuring Ninite Solution